Tutorial: Querx Panel
The Querx Panel application is available for Windows PC and Raspberry Pi. It displays measurements and alerts for up to nine sensors in a full screen visualization. This makes it possible to, for instance, create a large display in the fields of production and storage on a tight budget.
Querx Panel can be used free of charge.
Note: A DHCP server is required for the tutorial.
Installation on Windows
- Download the install file here and execute it.
- Follow the instructions that appear on the screen.
- Launch the app “Querx Panel”.
Installation on Raspberry Pi
- Download the image for Raspberry Pi here.
- Format the first partition of an SD-card in the FAT32 format and extract the archive to this location.
- Insert the SD-card into your Raspberry Pi.
- Connect a network cable and a mouse to your Raspberry Pi. The mouse is only required during configuration.
- Boot the device by connecting the power source.
Configuration
Configuration and operation are identical on all systems, once the software has been launched.
Entering setup mode
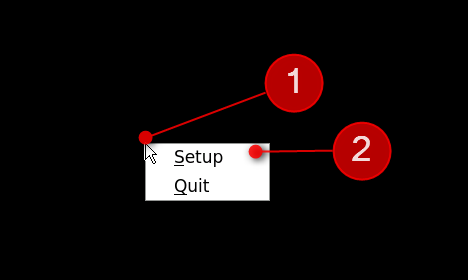
- Click the blank screen with the right mouse button.
- Select Setup from the drop down menu.
Basic settings
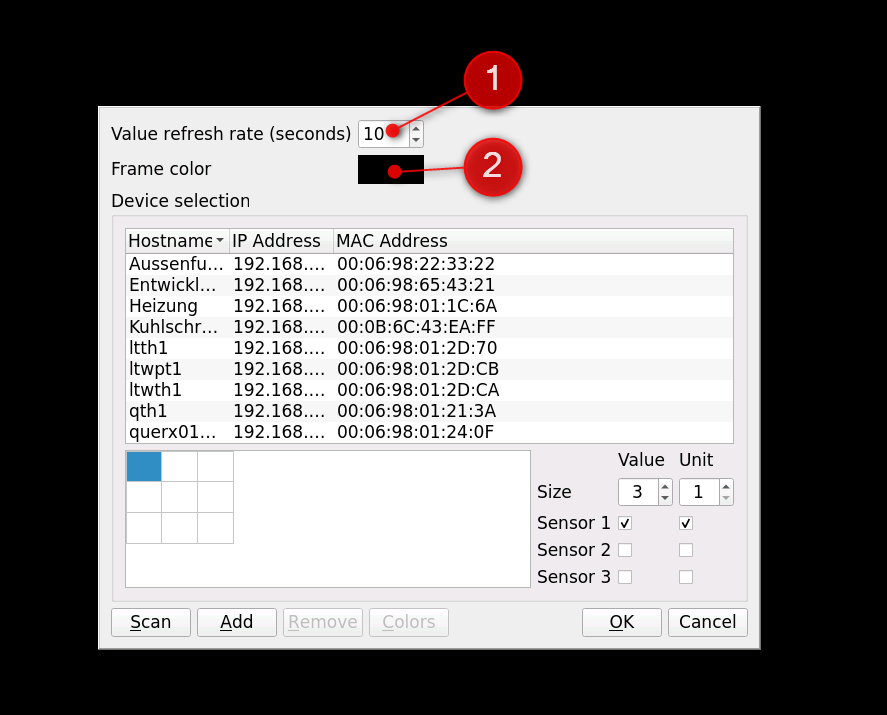
- Select the rate at which the display is updated.
- Select the color that is to be used for the individual displays’ frames.
Adding devices
- Select the device, whose values you wish to display.
- Select the section of the screen in which this device’s values will be displayed.
- Click Add.
Repeat this process if you wish to add several devices.
Configuring the display
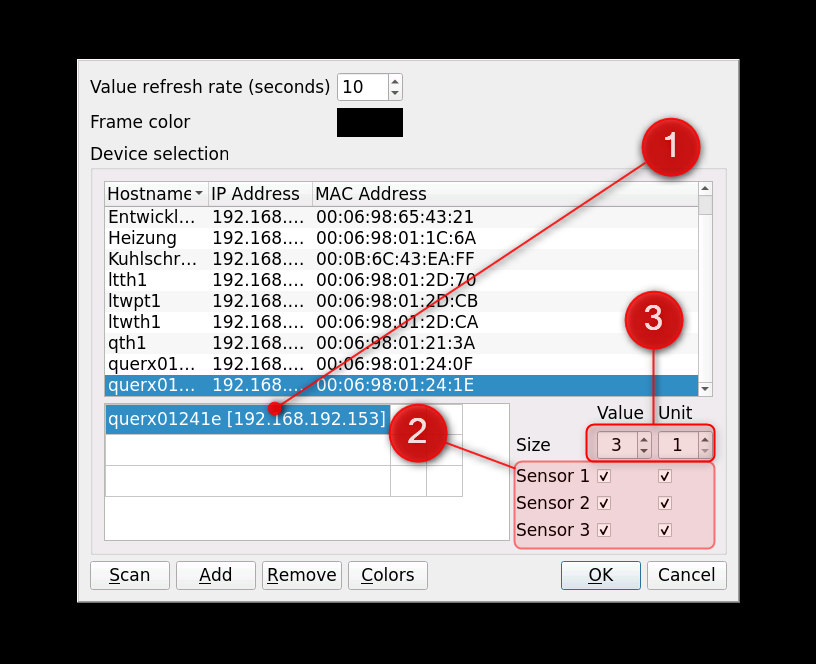
- Select the device you want to configure.
- Select the values you want to display.
- Configure the size in which value and unit are displayed.
Configuring the colors
- Select the device, whose display’s colors you want to change and click Colors.
- Select the colors for the display.
- Click Ok.

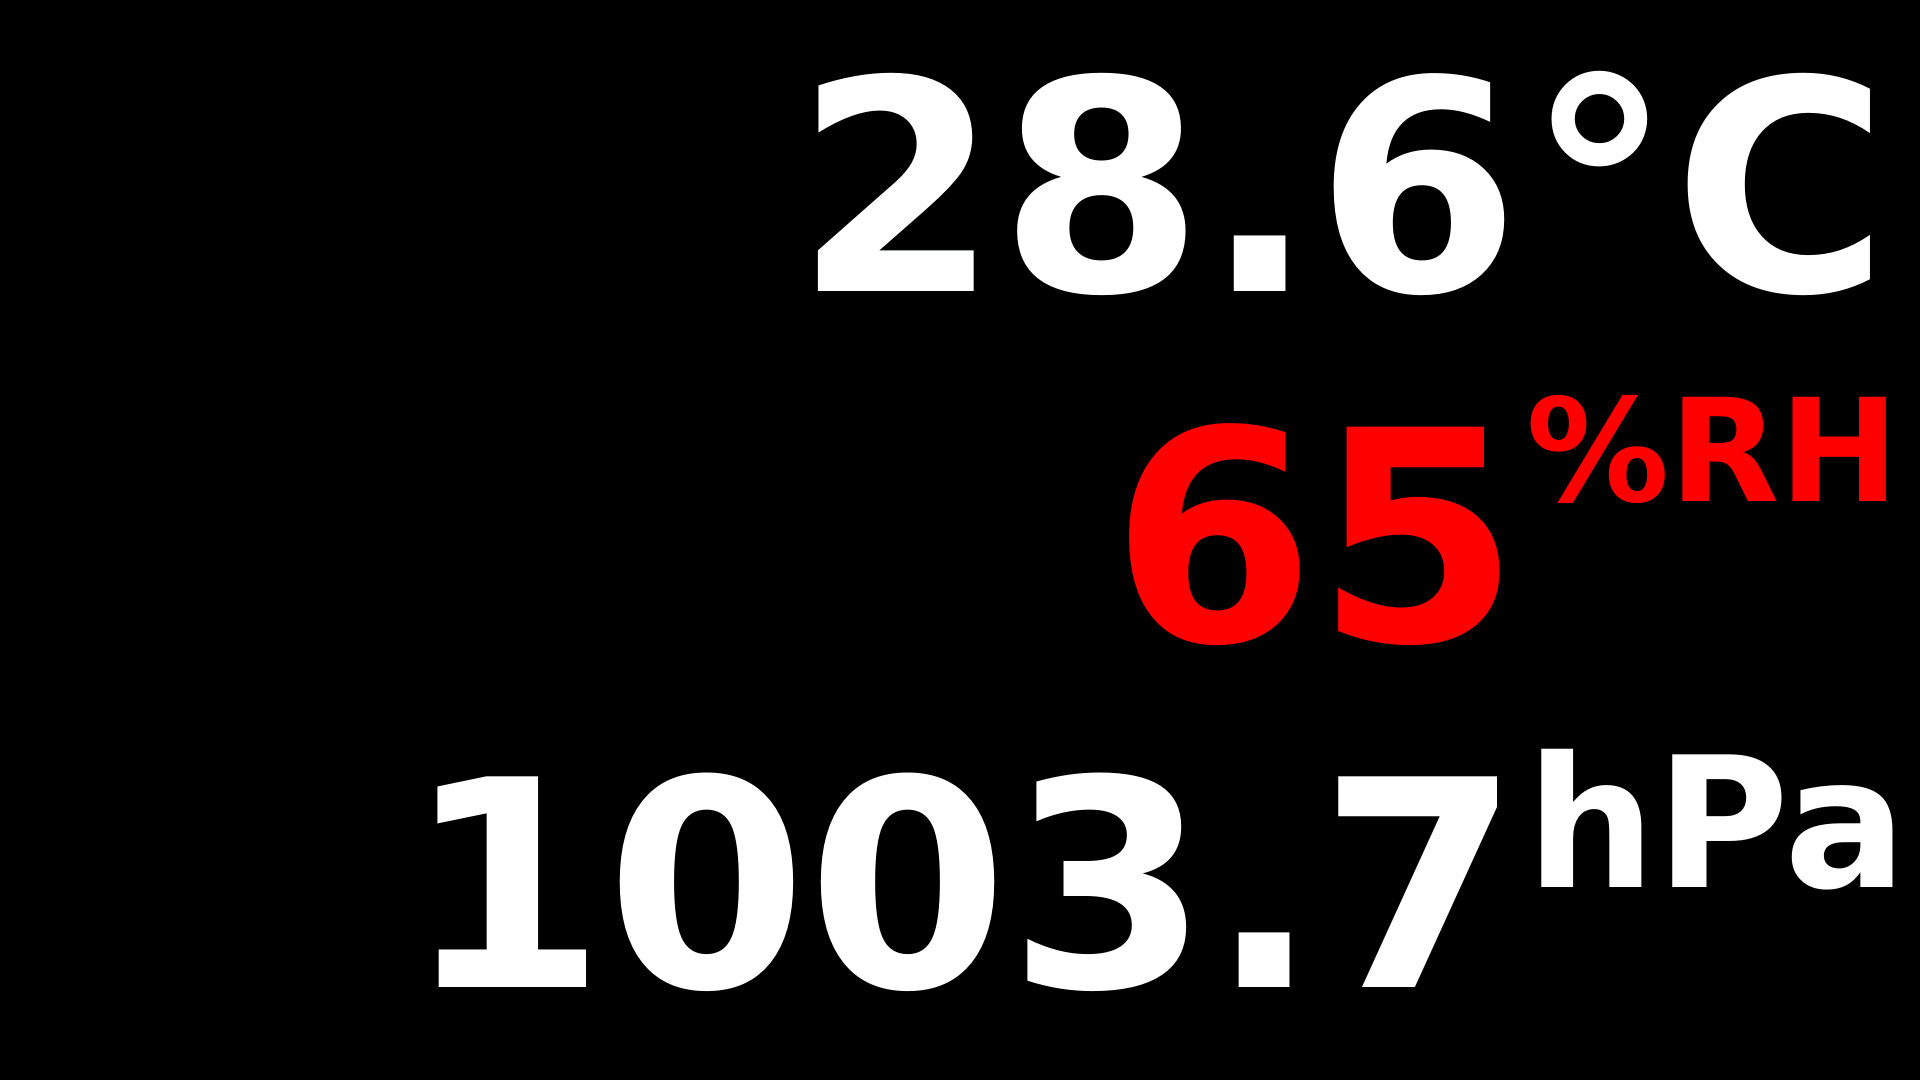
The result
The selected values appear on the monitor, arranged in the configured order. Alerts are highlighted by the selected colors.