Tutorial: Querx Firmware-Updates
egnite regularly provides updated firmware for the Querx range of products. These updates add new features or make the devices more user-friendly.
Installing such an update is easy and, due to the Recovery feature, very safe: The former version can easily be reactivated if any problems should occur during the installation.
Step 1: Determining your Firmware Version
In order to find out whether it makes any sense to install a firmware update, you should first determine which version is currently installed on your device.
- Open the Querx configuration area.

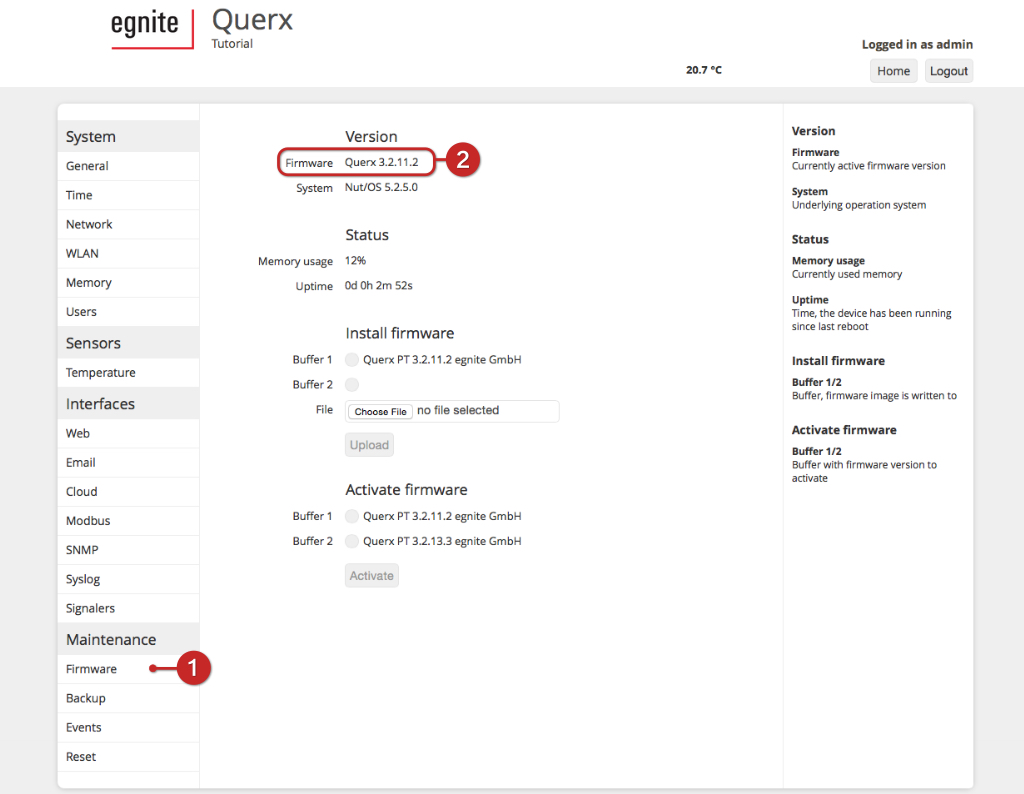
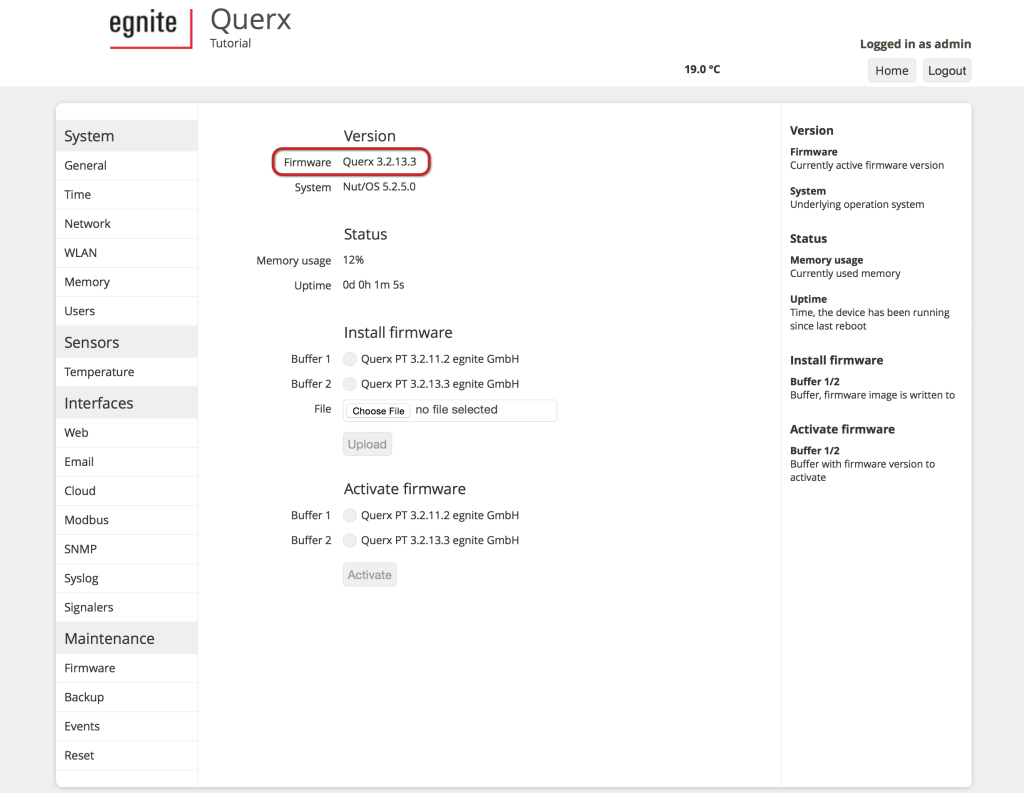
- Click the item Maintenance / Firmware in the configuration menu.
- The active firmware version is displayed in the section Version. In this example we are running version 3.2.11.2.
Step 2: Downloading New Firmware
Please navigate to the product support section of this website, to download current firmware.
- Select the model that you want to update from the list of products. For the sake of this tutorial we have selected the model Querx WLAN PT.

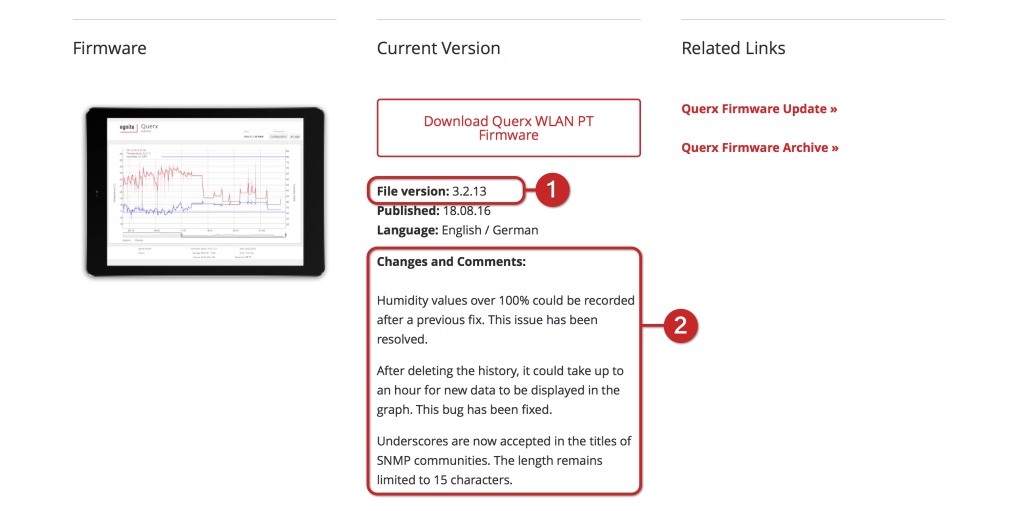
This will open the support-page for the selected product. The latest firmware version is available in the Firmware section.
- Compare the version number of the firmware installed on your Querx and the file version available on the website. An update might prove useful, if the number of the installed version is lower than the one on the website.
- The Changes and Comments list lets you know what the advantages of an update are.
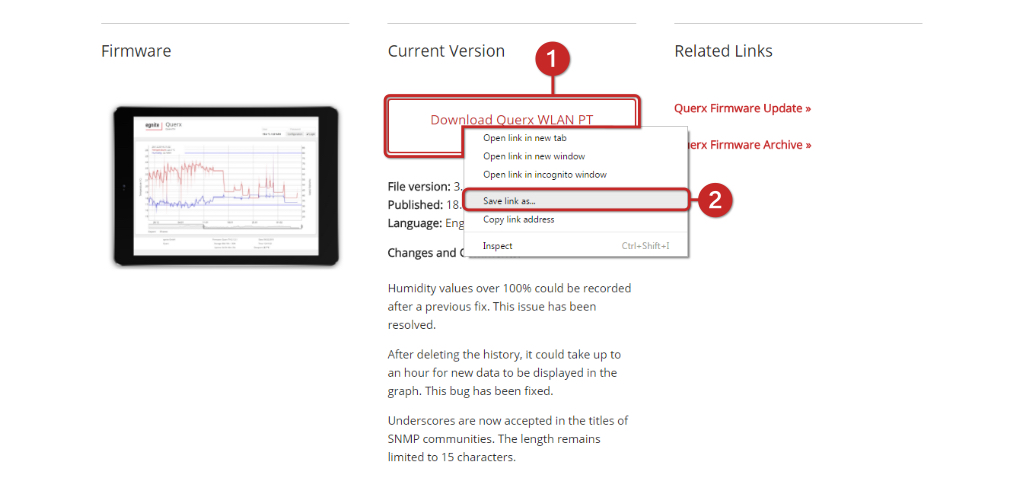
- If you have chosen to update the firmware, right-click the Download button.
- Click save file as… to download the file to your computer.
Step 3: Installing Firmware
After saving the firmware on your computer, return to the Querx configuration area.
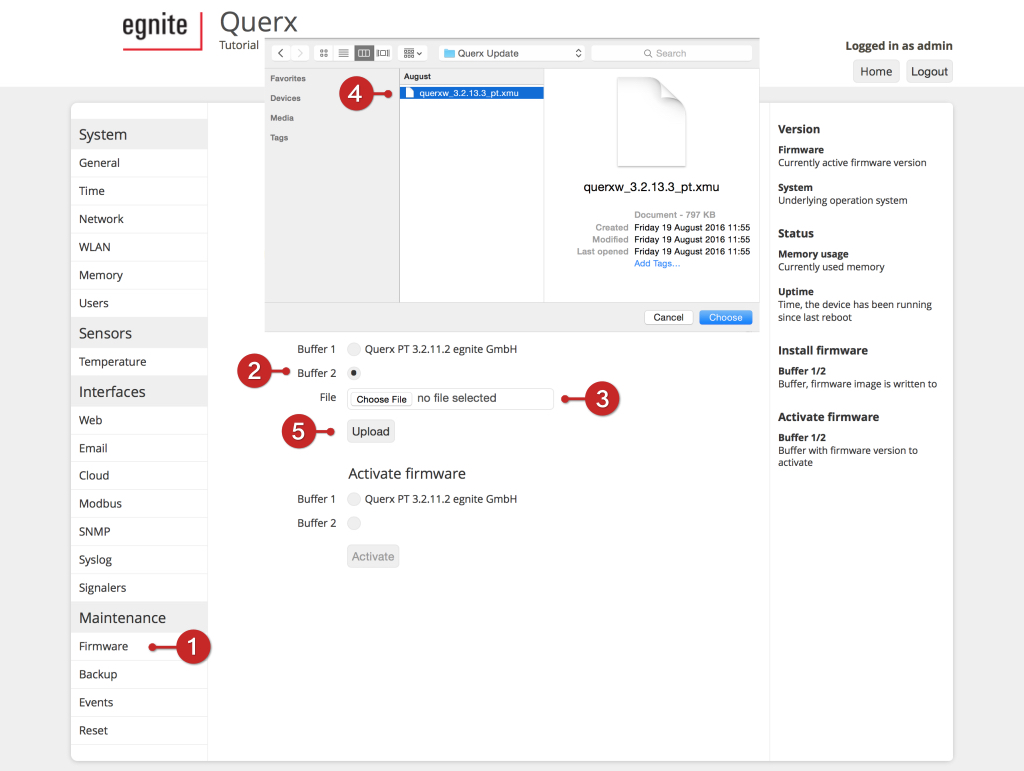
- Open the page Maintenance / Firmware.
- Select the buffer in which you wish to install the firmware image. It is advisable, not to use the buffer in which the current firmware is saved, to make it possible to reactivate this version if you experience any problems during the installation.
- Click Choose File.
- Select the firmware image downloaded in the previous step. Then click Open.
- Click the Upload button.
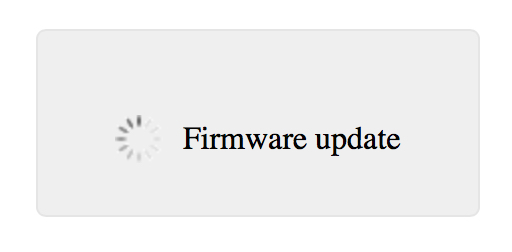
The page will reload as soon as the upload has been completed. The installed firmware version is now displayed in the selected buffer.
Step 4: Activating Firmware
A new version of the firmware is now available on your device and can be activated if required.
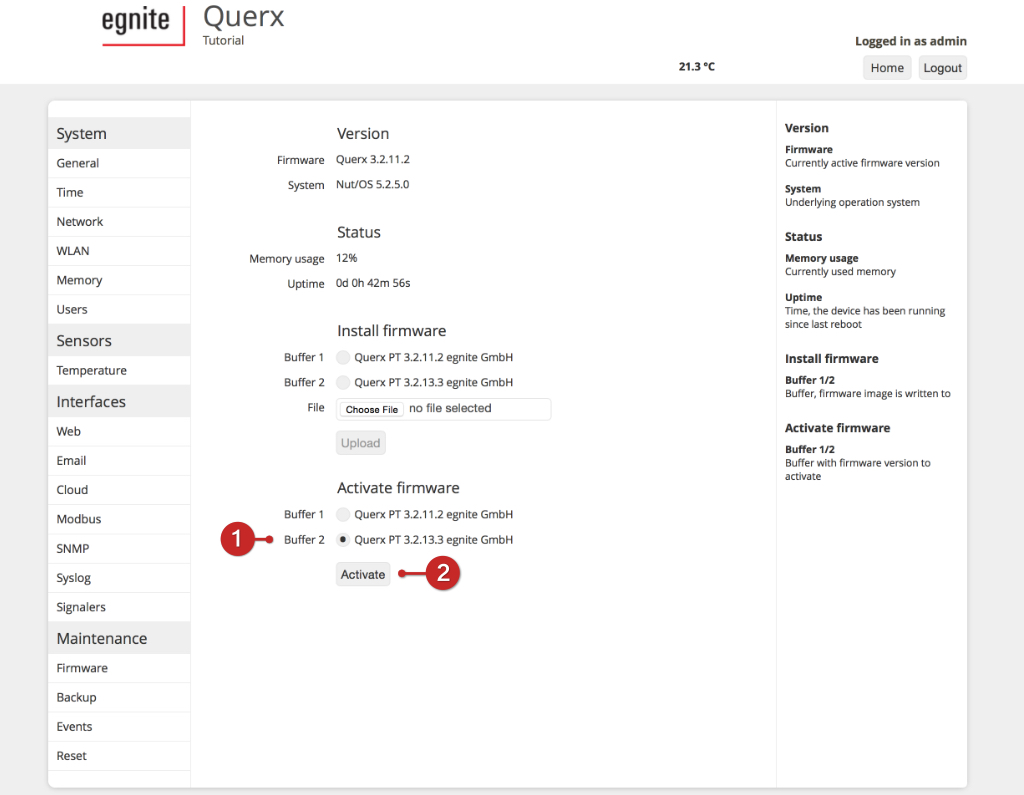
- In the section Activate firmware, select the buffer containing the firmware you wish to activate.
- Click the button Activate.
The image will now be transferred to the internal memory of Querx. The device will reboot as soon as this process is completed.
Please do not disconnect Querx from the power supply while the firmware is being activated, to prevent the device from being damaged.
Once the device has rebooted it will be running the activated firmware.
Recovery Feature
If you encounter any unexpected problems after updating the firmware Querx can activate the firmware image stored in the second buffer.
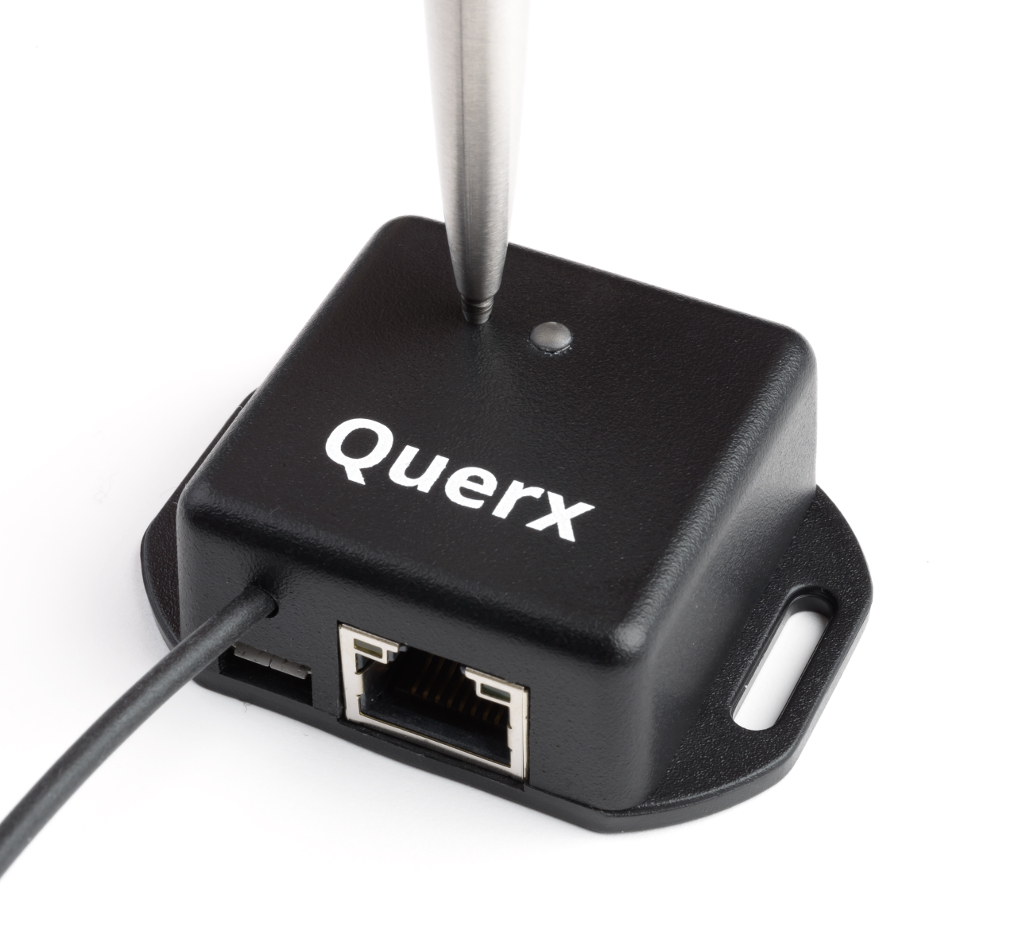
You will need a biro to use the Recovery feature.
Unplug the micro-USB cable to disconnect Querx from the power supply.
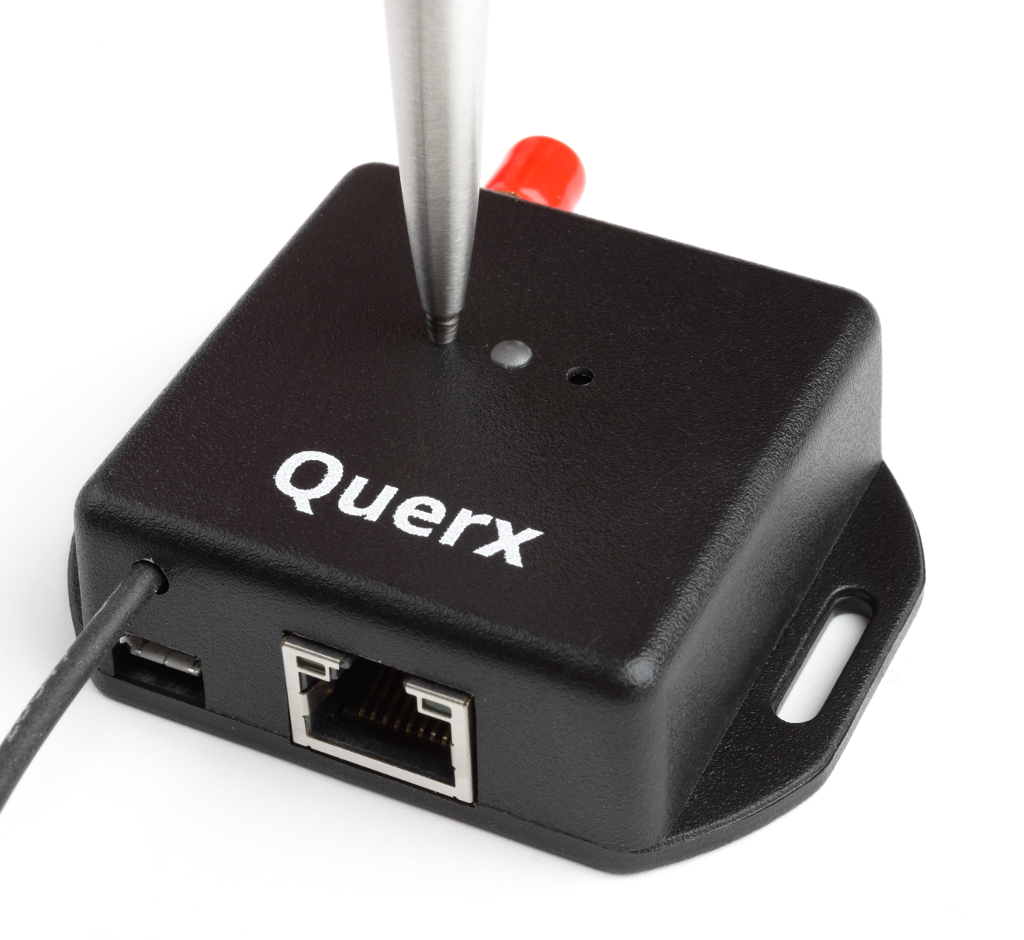
Use the biro to press the switch (see images).
Keep the switch pressed while reconnecting Querx to the micro-USB cable.
The status-LED will start to flash red. It will stop flashing and remain red after a few seconds.
The firmware image stored in the secondary buffer will be loaded into the internal memory once you release the switch. The device will then reboot with the changed firmware.
Please do not disconnect Querx from the power supply while the firmware is being activated, to prevent the device from being damaged.
Do not use a pencil to reset the configuration, as the pencil lead might break and pieces of graphite can damage the device.