Tutorial: Querx and PRTG
Paessler PRTG Network Monitor is a commercial monitoring solution for networks and IT-infrastructure. A trial-version of PRTG can be downloaded from the Paessler Website. You can monitor up to 100 interfaces free of charge with no time limitation. If you wish to monitor more sensors, you will need to purchase a license.
This tutorial will tell you how to integrate Querx WLAN TH into PRTG, in order to monitor temperature, humidity and dew point via SNMP.
Before following this tutorial, please ensure that the Querx SNMP agent is activated. In order to do so, open the page Interfaces / SNMP in the Querx web interface. Select the checkbox Activate and, if required, enter “public” in the input field Read-Community. Finally, reboot Querx.
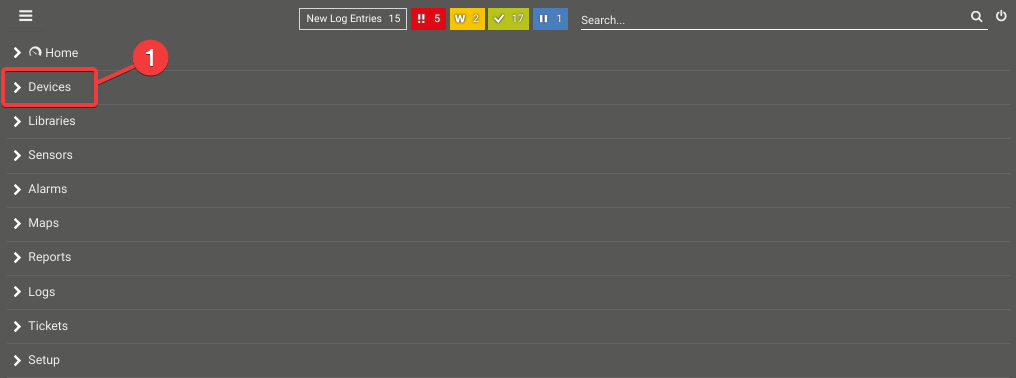
Step 1: Set up device
- Click Devices at the upper edge of the screen.
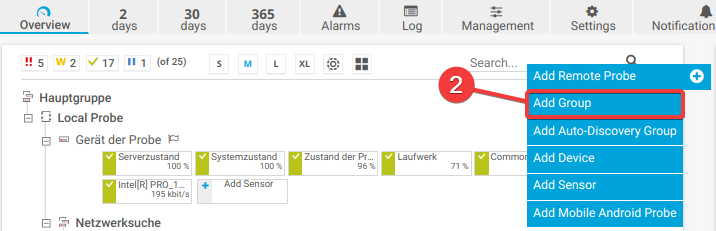
- Click the button Add Group.
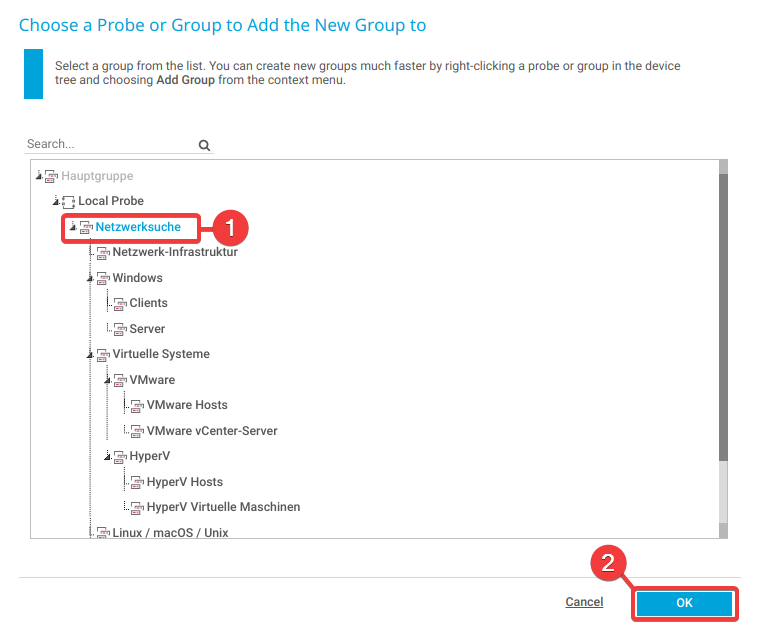
- Select the item Network Discovery.
- Click OK.
- Enter a Group Name. For this demonstration we chose egnite.
- Leave the Credentials settings as they are.
- Click OK.

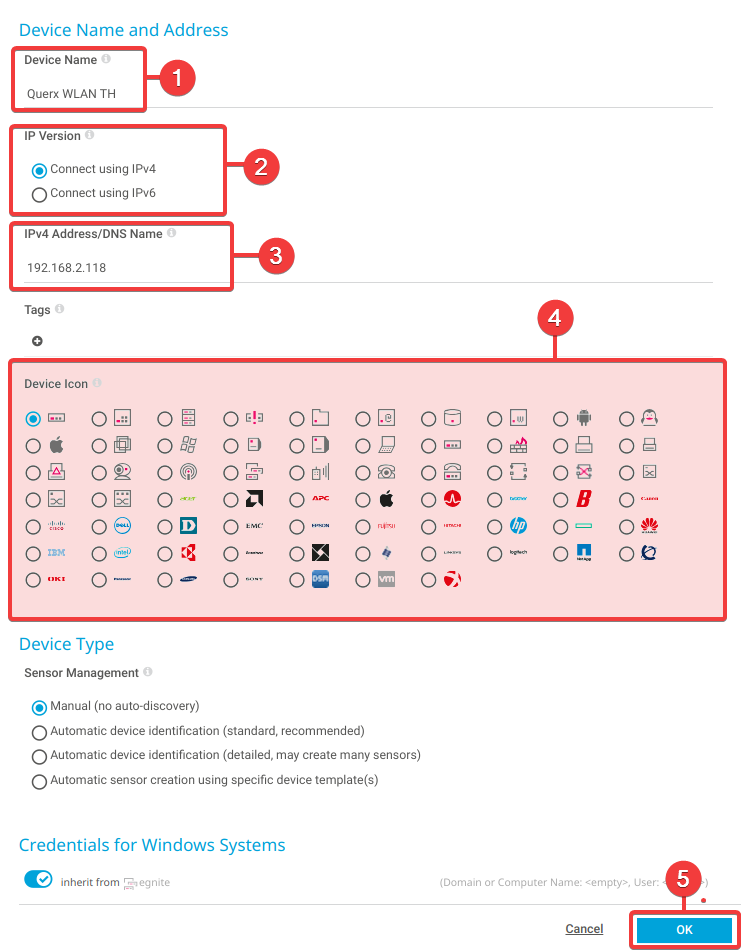
- Click Add Device in the group egnite.

- Enter a Device Name. For this demonstration we chose Querx WLAN TH.
- Click IPv4 in the section IP-Versioin.
- Enter the device's IPv4-Address.
- Select a Device Icon which will let you identify the device and leave the remaining settings for Device Type and Credentials as they are.
- Save your changes.
Step 2: Add sensor
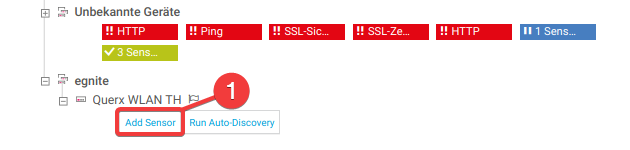
- Back in the main menu, click Add Sensor in the device egnite/Querx WLAN TH.
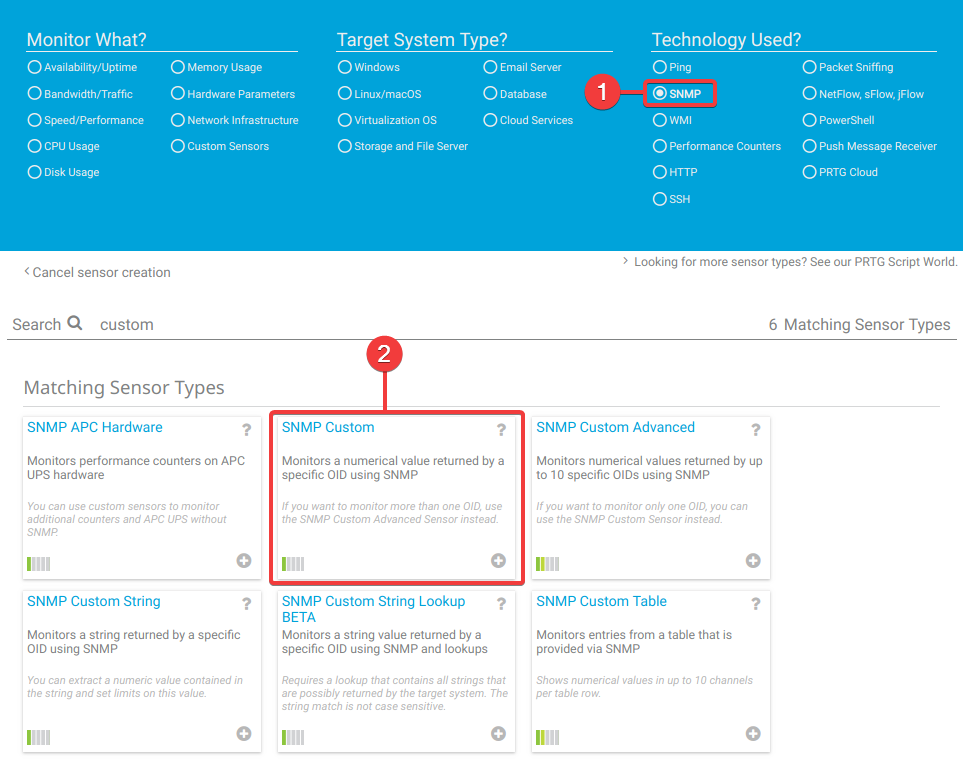
- Click SNMP in the section Technology Used.
- Select SNMP Custom From the list of Matching Sensor Types.
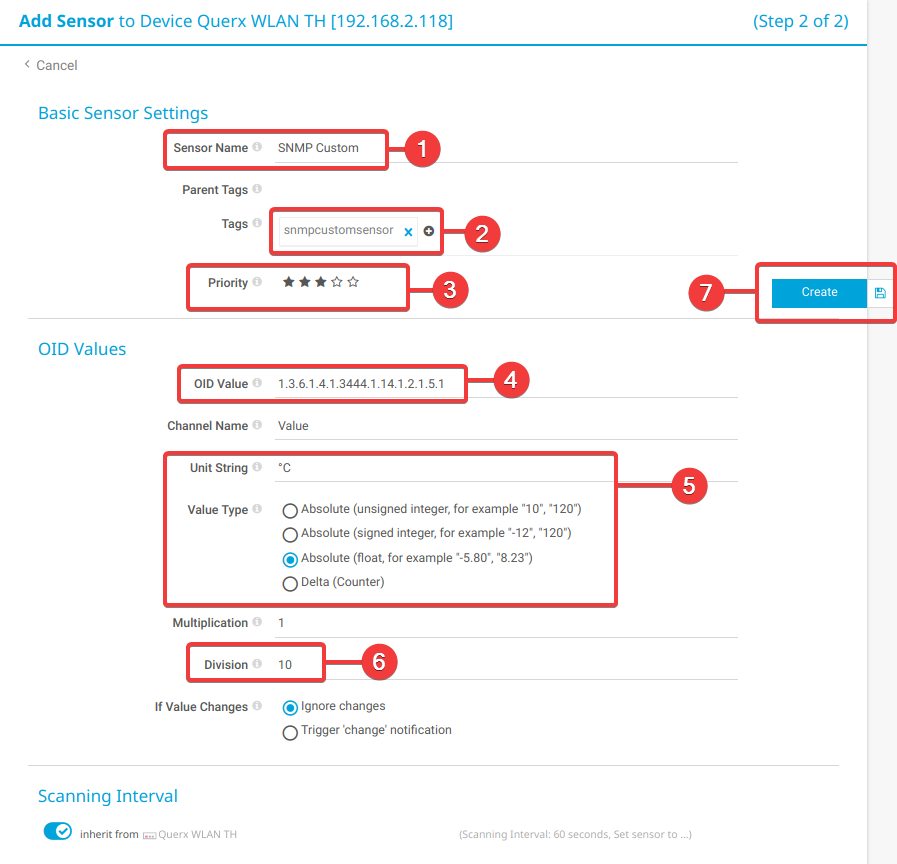
Some details on the sensor need to be added on the following page.
- Enter a Sensor Name. For this demonstration we chose SNMP Custom.
- Enter some meaningful Tags.
- Set the sensor's Priority.
- Enter the temperature sensor's SNMP-OID (1.3.6.1.4.1.3444.1.14.1.2.1.5.1).
- Enter the Unit String which you want the measurements to be displayed, e.g. °C. Select Gauge (float) from the section Value Type.
- The values are internally saved without a decimal point, so the Divisor 10 needs to be added. This ensures that 25.0 °C is displayed instead of 250.0 °C.
- Click Create.
Repeat the last steps for the humidity and dew point sensors.
The most important SNMP Object Identifiers (OIDs) for Querx are:
Temperature
1.3.6.1.4.1.3444.1.14.1.2.1.5.1
Humidity
1.3.6.1.4.1.3444.1.14.1.2.1.5.2
Dew point
1.3.6.1.4.1.3444.1.14.1.2.1.5.3
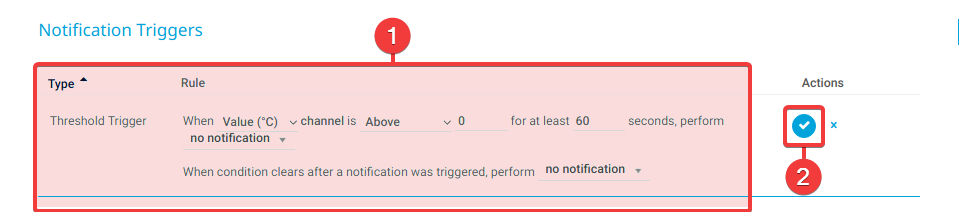
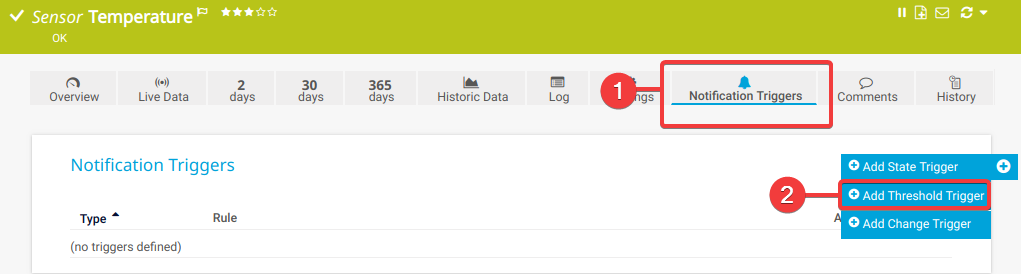
Step 3: Configuring alert notifications
- Click the sensor for which you wish to configure alert notifications.

- Click Notifications.
- Click Add Treshold Trigger
- Enter which values are to trigger alerts in the section Threshold Trigger.
- Save your settings.